
 Bookmark
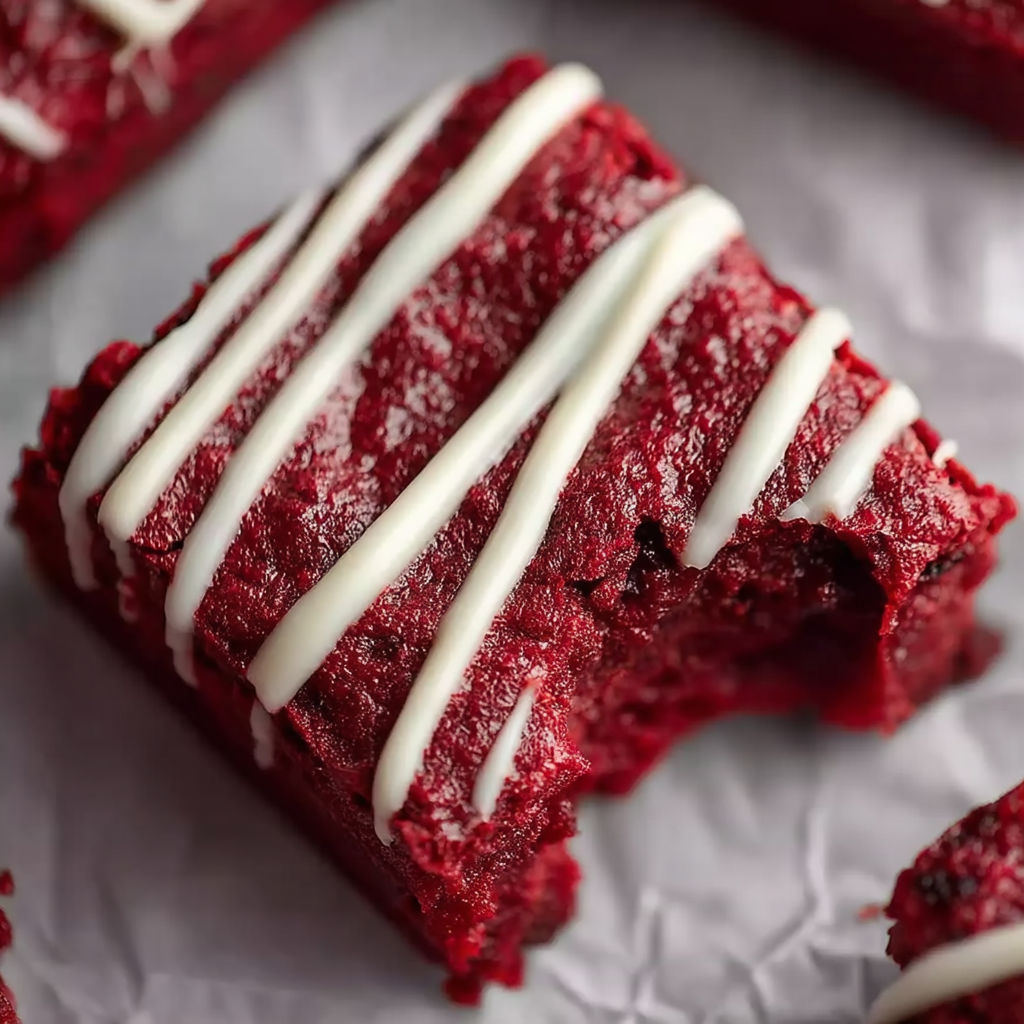
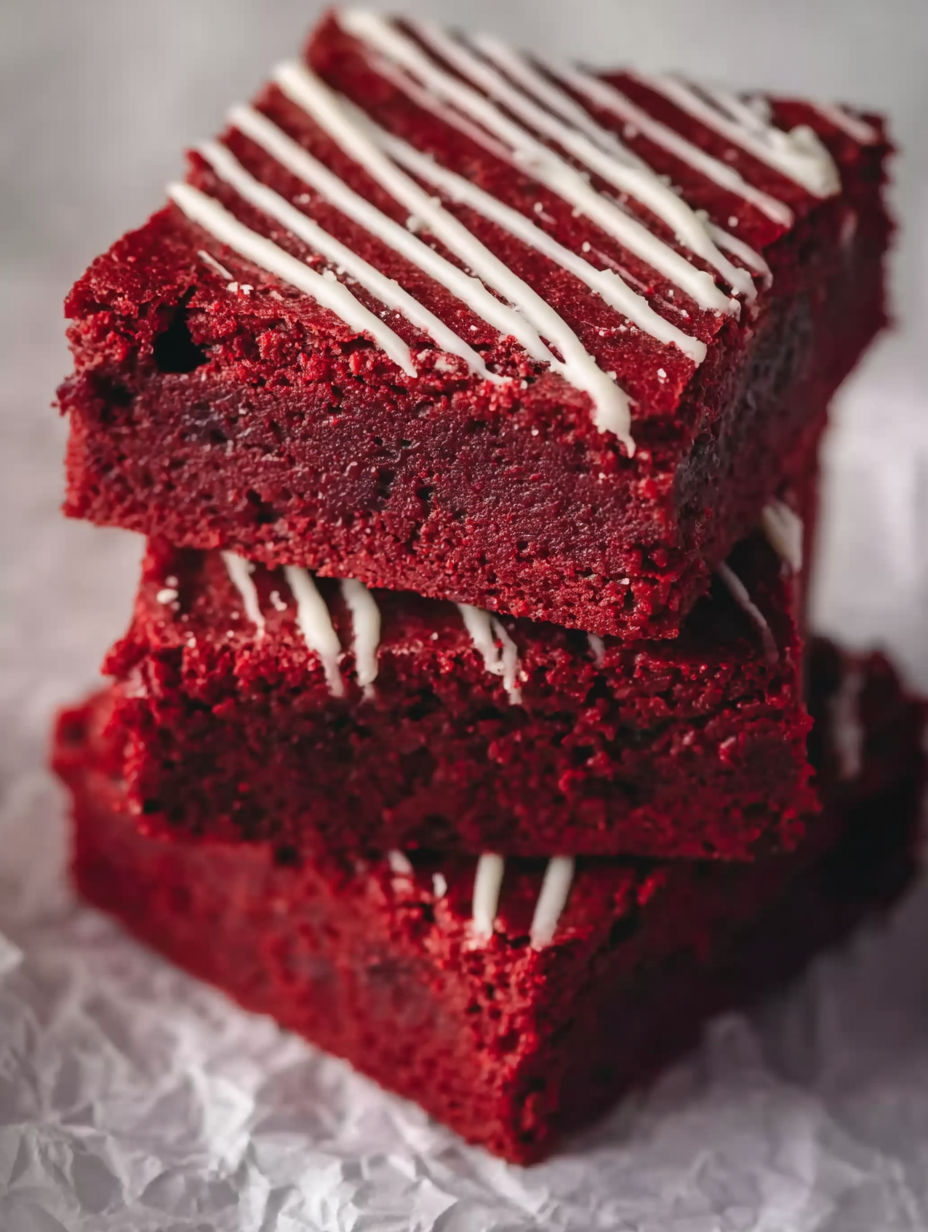
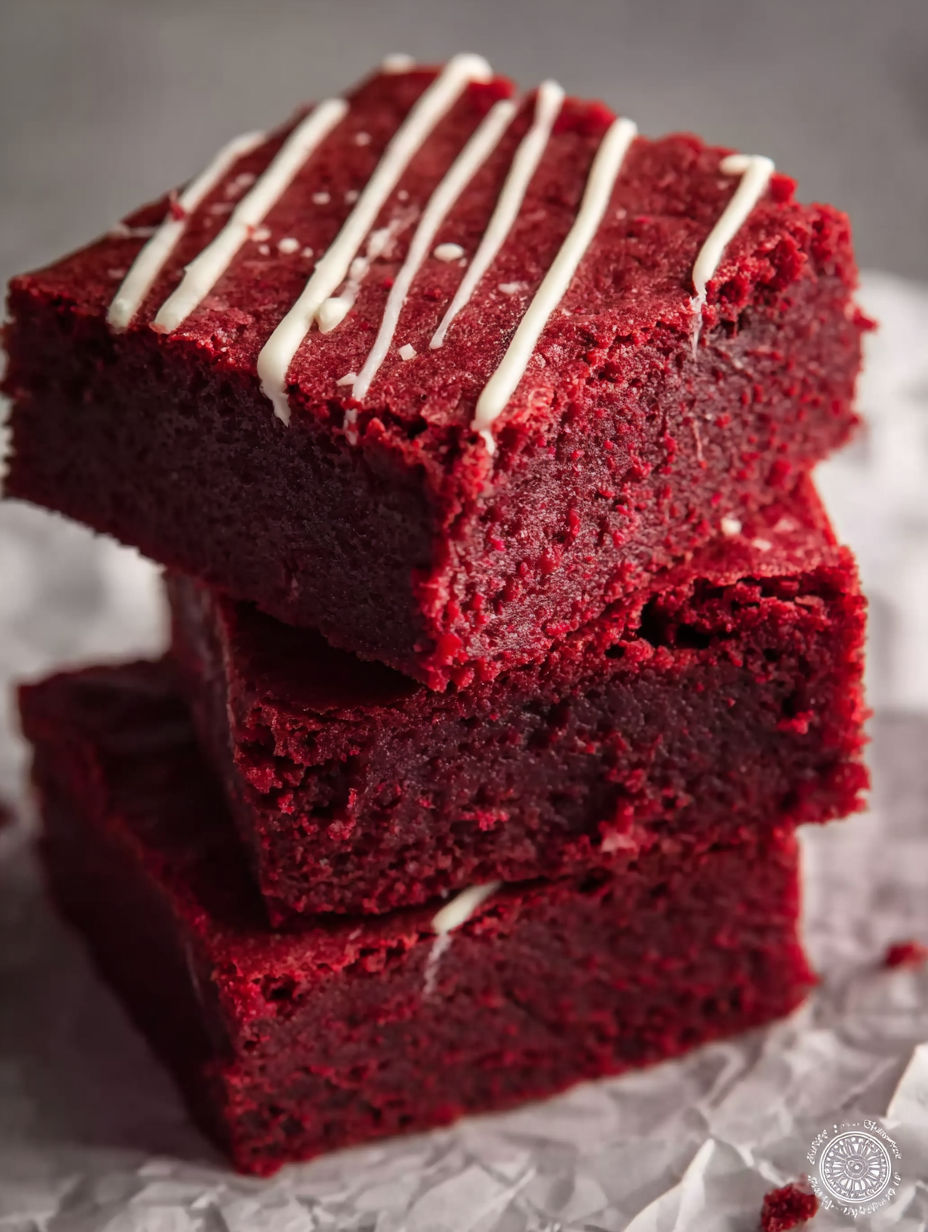
These fudgy red velvet brownies are the best way to enjoy a rich, chocolatey dessert with that classic red velvet twist. Dense and moist, they combine the deep chocolate flavor of traditional brownies with the tangy, vibrant character of red velvet. Whether you are baking for a special occasion or simply craving a decadent treat, these brownies deliver both stunning color and a melt in your mouth texture every time.
I first made these during a quiet weekend and ended up sharing them with everyone I know. Now they are my go to for giving friends a heartfelt homemade gift.
Ingredients
- Butter: Adds richness and ensures fudgy softness. Choose high quality unsalted butter for best flavor
- Chopped semisweet chocolate: For a deep chocolate punch. Chopped chocolate works better than chips for smoother melting
- Granulated sugar: To sweeten perfectly without overpowering
- Eggs: Bind together the batter and create the chewy texture
- Vanilla extract: Enhances the chocolate notes. Use pure vanilla extract for richer aroma
- White vinegar: Provides the subtle acidity that gives red velvet its signature tang. This is the secret to that authentic flavor balance
- Red gel food coloring: Creates the iconic vibrant color. Gel type prevents extra liquid from altering texture
- Unsweetened cocoa powder: For a mild, bittersweet chocolate taste. Opt for Dutch processed cocoa for smooth color and flavor
- All purpose flour: Adds structure without making it tough. Sift to avoid lumps and keep the batter tender
- Salt: Just a pinch to balance sweetness and enhance other flavors
Instructions
- Sauté the Aromatics:
- Not applicable in this recipe but this spot is reserved for the initial flavor building step in savory dishes.
- Melt Butter and Chocolate:
- In a microwave safe large bowl, melt butter and chopped chocolate together using 30 second bursts. Stir with a whisk after each burst until smooth and fully melted. This creates the rich chocolate base for your brownies.
- Mix in Sugar:
- Add the granulated sugar to the warm butter and chocolate mixture. Use an electric mixer on medium speed to combine until the batter is glossy and smooth. This step dissolves the sugar well and preps the texture.
- Add Eggs and Flavorings:
- Add eggs one at a time, mixing well after each addition for uniform distribution which creates the chewy structure. Stir in vanilla extract, white vinegar, and red gel food coloring to develop that classic red velvet flavor and color.
- Sift Dry Ingredients:
- In a separate bowl, sift together cocoa powder, flour, and salt. Sifting prevents lumps and ensures an even mix throughout the batter.
- Combine Wet and Dry:
- Gradually add the sifted dry ingredients to the wet mixture. Mix gently until just combined to avoid a dense or tough brownie. Over mixing is a common mistake that reduces fudginess.
- Add Optional Mix Ins:
- If desired, fold in white chocolate chips or nuts to add texture and surprise bursts of flavor. Be gentle to not break the batter consistency.
- Pour and Bake:
- Transfer the batter to a parchment lined 8x8 inch baking pan. Scrape every bit from the bowl using a rubber spatula and spread evenly. Bake in a preheated oven until a toothpick inserted in the center comes out with moist crumbs but no wet batter. This usually takes about 25 to 30 minutes.
- Cool and Cut:
- Allow the brownies to cool completely in the pan to set properly. Use a sharp knife to cut into 16 squares for perfect portions.
My favorite part has to be the tang from the vinegar it adds just the right contrast to the sweet chocolate and really makes the flavor unforgettable. One time I made a batch for a family gathering and watched everyone wait eagerly for the first bite. It’s one of those recipes that sparks joy and nostalgia in every bite.
Storage Tips
Store these brownies at room temperature in an airtight container to keep them soft and fudgy for up to 3 days. Refrigerate if you want to keep them longer, up to 1 week, but bring to room temperature before eating to soften. They freeze beautifully too. Wrap individual squares tightly with plastic wrap and place in a freezer bag. Thaw overnight in the fridge or for a few hours at room temperature.
Ingredient Substitutions
Butter can be swapped with vegan butter for a dairy free option but expect a slight texture difference. Semisweet chocolate can be replaced with dark chocolate for a more intense chocolate taste. If you do not have red gel food coloring, liquid can work but may affect texture slightly use less liquid to compensate. White vinegar is essential to achieve the classic tang but you could try apple cider vinegar for a subtle twist.
Serving Suggestions
Serve these brownies as they are for a satisfying treat or dress them up with a dusting of powdered sugar for a pretty presentation. For an extra indulgence, top with cream cheese frosting tinted pink or red for a Valentine’s Day vibe. Pair with fresh berries or a scoop of vanilla ice cream for a perfect dessert.
These brownies are easy to make and deliver a vibrant red color with a fudgy texture every time. Serve warm or with a scoop of vanilla ice cream for an extra special treat.
FAQs About This Recipe
- → What gives red velvet brownies their unique flavor?
The distinctive flavor comes from a blend of mild cocoa powder and acidic ingredients like vinegar or buttermilk, which create a subtle tanginess balanced with chocolate notes.
- → How can I tell when these brownies are done baking?
Insert a toothpick into the center; it should come out with a few moist crumbs but no wet batter to ensure perfectly fudgy brownies.
- → What ingredients contribute to the fudgy texture?
Butter and melted semi-sweet chocolate create richness, while careful mixing ensures a dense but tender crumb.
- → Can I add mix-ins or toppings to these brownies?
Yes, white chocolate chips, chopped peanuts, or swirls of peanut butter or caramel can be added for texture and flavor. A dusting of powdered sugar or cream cheese frosting also complements the red velvet taste.
- → How should I store leftover brownies?
Store in an airtight container at room temperature for up to 3 days, refrigerate for up to a week, or freeze for up to 2 months.
- → Why use gel food coloring instead of liquid?
Gel food coloring provides a vibrant red color without adding extra liquid, helping maintain the brownies’ fudgy texture.