
 Bookmark
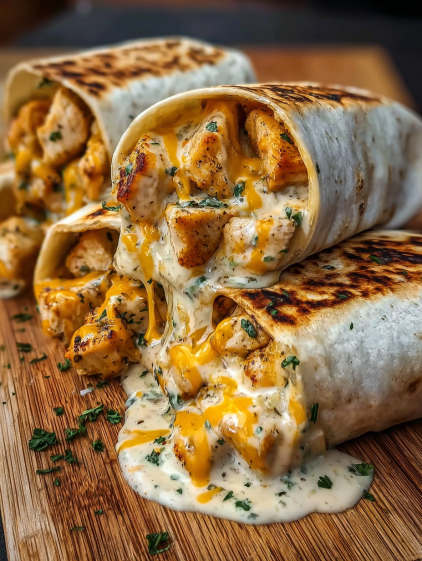
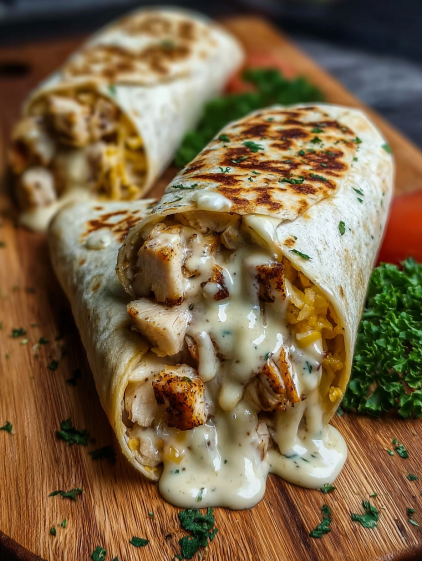
Cheesy garlic chicken wraps are my trick for those evenings when comfort and speed both matter. With tender chicken, gooey cheese, and a punchy garlic sauce, they come together fast yet never fail to please. Perfect as a hearty lunch, family dinner, or casual get-together, these wraps always disappear in minutes.
The first time I made these wraps I was searching for a satisfying dinner on a busy Wednesday. Now they pop up on repeat whenever friends stop by for a last-minute meal.
Ingredients
- Chicken breasts: Diced chicken cooks quickly and stays juicy. Look for firm pink meat with no discoloration
- Olive oil: Helps seasonings adhere and gives a nice sear. Use extra virgin for best flavor
- Garlic powder: Delivers deep garlicky flavor without mincing. Look for fresh-smelling powder not clumpy
- Onion powder: Adds savory warmth that rounds out the seasoning
- Paprika: Brightens flavor with a hint of smokiness. Opt for smoked if you love a deeper taste
- Salt and pepper: Classic flavor enhancers. Always taste and adjust
- Cheddar cheese: Melts well and brings mild sharpness. Freshly shred for best results
- Mozzarella cheese: Boosts the gooey factor and balances flavors. Pick a low-moisture variety so wraps do not get soggy
- Flour tortillas: Large wraps hold all the fillings nicely. Choose soft and pliable tortillas for easy folding
- Creamy garlic sauce: The heart of the wrap brings richness and tang. If store-bought check the label for real garlic
- Fresh parsley: For garnish and freshness. A quick sprinkle lifts the whole dish
Instructions
- Prepare the Chicken:
- Combine chicken pieces with olive oil, garlic powder, onion powder, paprika, salt, and pepper in a large bowl. Mix thoroughly so every piece is coated with seasoning
- Cook the Chicken:
- Heat a non-stick skillet over medium heat. Add seasoned chicken. Cook for six to eight minutes, stirring occasionally, until cooked through and lightly golden. Check that juices run clear and there is no pink inside
- Assemble the Wraps:
- Spread creamy garlic sauce evenly on each tortilla. Make sure to cover the surface to each corner. Add cooked chicken on top, then sprinkle both cheeses generously over the chicken
- Fold and Toast the Wraps:
- Fold in the sides and roll each tortilla into a tight wrap. Heat the skillet again and cook the wraps seam side down for two to three minutes per side. Use gentle pressure to ensure the cheese melts and the tortillas turn golden brown
- Finish and Serve:
- Remove wraps from heat. Let cool briefly. Slice each in half on the diagonal. Sprinkle chopped fresh parsley over the top if you wish. Serve while hot so the cheese stays melty
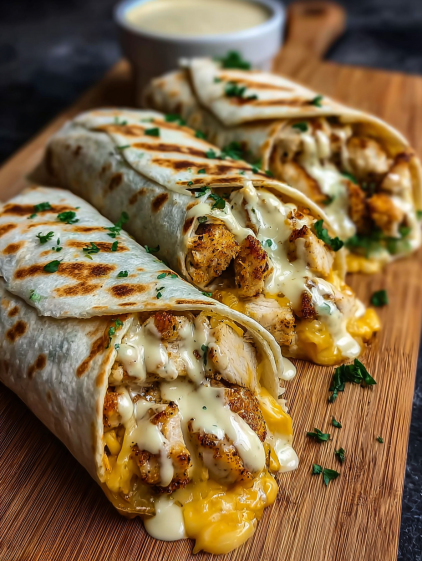
Cheesy mozzarella has to be my favorite in this wrap. Pulling apart a warm wrap and seeing that cheese stretch takes me straight back to one of those cozy rainy nights when everyone gathered around the kitchen just waiting for that first bite
Storage Tips
Leftover wraps keep well in the refrigerator for up to two days. Wrap them tightly in foil or parchment to prevent drying. For best results, reheat on a skillet which revives the tortilla’s crispiness and melts the cheese anew
Ingredient Substitutions
You can use boneless chicken thighs if breasts are not available. Thighs are juicier and add extra flavor. For dairy-free wraps, pick a vegan shredded cheese and your favorite plant-based garlic sauce. Whole wheat or gluten-free tortillas make the wraps more dietary-friendly
Serving Suggestions
Pair these wraps with fresh greens or a crisp cucumber salad for balance. They also work great as a game day snack halved and arranged on a platter. For a bigger meal, offer with baked sweet potato fries on the side
Cultural Context
Wraps like these became popular in American lunch culture for their versatility and grab-and-go convenience. Adapting classic flavors like garlic chicken and melted cheese into a warm tortilla is my nod to comfort food traditions layered with modern ease
Seasonal Adaptations
You can add fresh summer tomatoes or crunchy bell peppers for extra freshness. In colder months a pinch of cayenne adds warmth and depth. Try drizzling with a touch of honey-garlic sauce for a fall-inspired twist
Success Stories
Making this with friends on a Sunday led to a new house tradition. Each person adds their favorite cheese or sauce. Everyone ends up with a wrap that suits their taste yet still gets the melty goodness we all love
Freezer Meal Conversion
To freeze, assemble the wraps without toasting. Wrap each tightly and store in a freezer bag. When ready to eat, thaw overnight then crisp in a skillet until the cheese melts and the exterior is golden. This makes for convenient grab-and-go lunches
With just a few steps and simple ingredients, you get a wrap that tastes restaurant-worthy. Enjoy this cheesy, garlicky comfort any time the craving hits
FAQs About This Recipe
- → Can I use chicken thighs instead of breasts?
Yes, chicken thighs offer a juicier texture and deeper flavor, making them an excellent alternative for wraps.
- → How do I make them dairy-free?
Swap in plant-based cheeses and a dairy-free garlic sauce for similar texture and flavor.
- → What's the secret to a golden, crisp wrap?
Toast wraps seam side down in a hot skillet, pressing gently to achieve an even golden crust.
- → Can I prep the chicken in advance?
Absolutely. Cook and season chicken ahead, then refrigerate until you're ready to assemble and toast the wraps.
- → What sides work with these wraps?
Fresh salads, roasted vegetables, or sweet potato fries make great complimentary sides for a hearty meal.
- → How can I add a smoky flavor?
Toast wraps on a grill pan or outdoor grill to infuse a subtle smoky note and beautiful grill marks.